Airstream Restoration
-
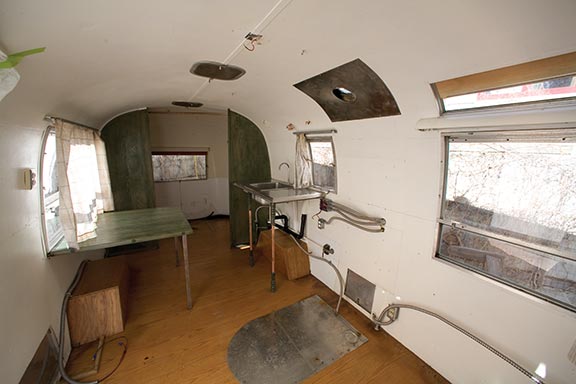 I knew exactly what I was getting into with this 1968 Safari 22′ single-axle Airstream (with a scale weight of 3,200#). Here’s what she looked like in the beginning. BEFORE. One of my farmhands had owned her for a few years, but said the sound and the smell of mice in the walls was getting to him. I asked him if he’d sell it to me for $2,000 and then help me renovate it. He was game.
-
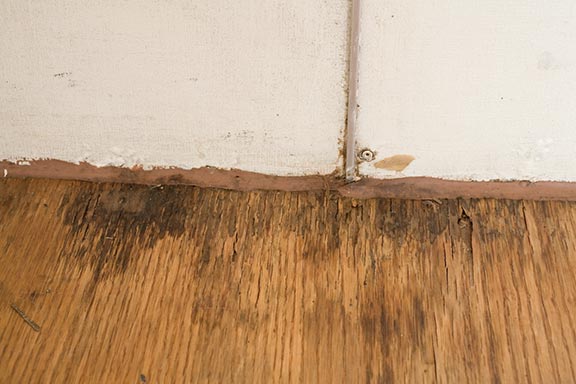 Floor mold. Never a good sign. But it IS a sign that water’s getting in somewhere. Turned out, the main source here was leaky window seals.
-
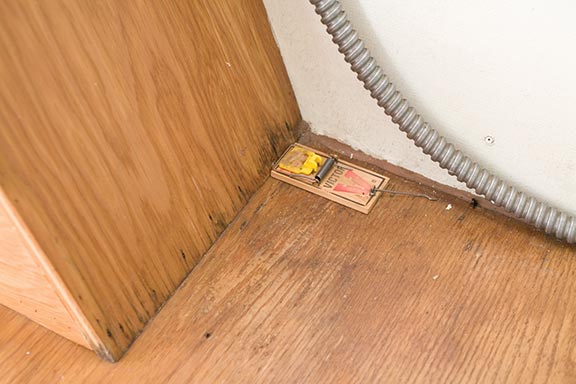 You know what this means!
-
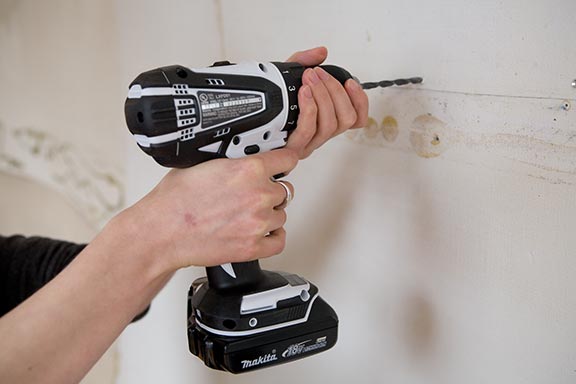 It’s easier than you think to take out rivets. Grab a drill bit the size of your rivets and put the tip into the hole in the center.
-
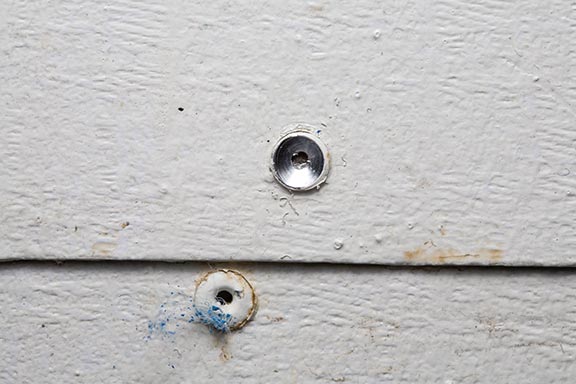 It will look like a tiny donut. Drill until it disappears, freeing up what the rivet is attaching. In this case, the walls. Be careful not to drill past the rivet head into the soft aluminum sheeting.
-
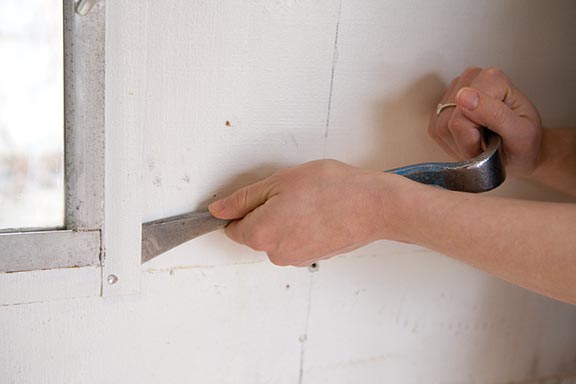 After you’ve drilled all the rivets in a panel, use a pry bar to work things loose.
-
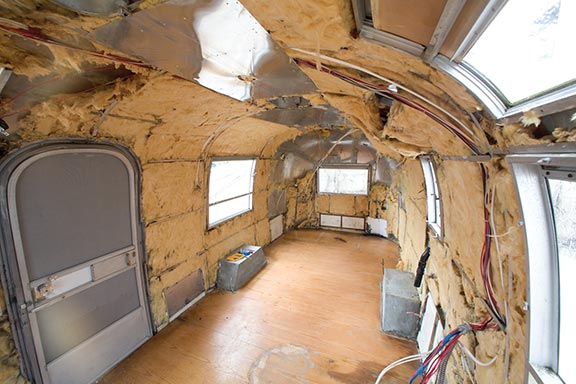 Panels begone!
-
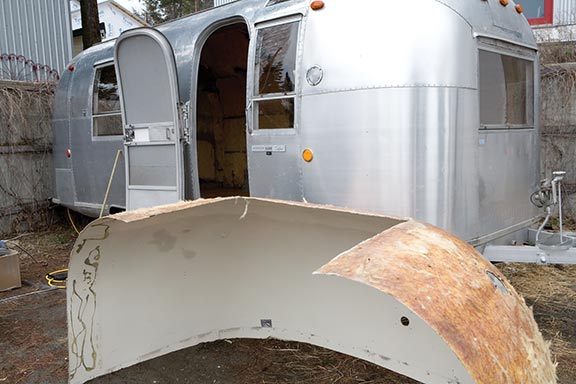 In both ends of the Airstream, there were fiberglass panels instead of aluminum panels. These also helped structurally to strengthen both ends, but I didn’t like them. The front panel had a shelf as part of the fiberglass unit that I knew I wouldn’t want. What did I do? I discarded these and put down new strips of wood. I’ll show you that later.
-
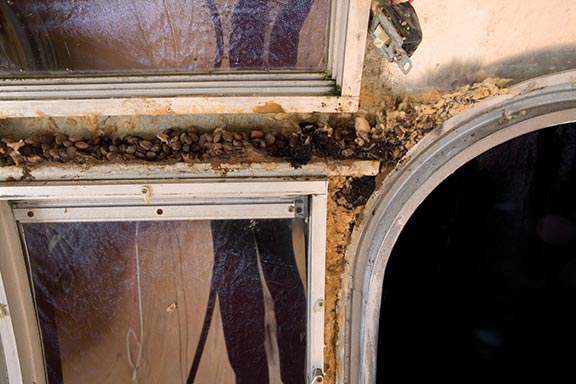 OMG! The black goo you see is mouse droppings, along with some mold from the leaky window seals. No wonder she stank to high heaven. I hate meeses to peeses.
-
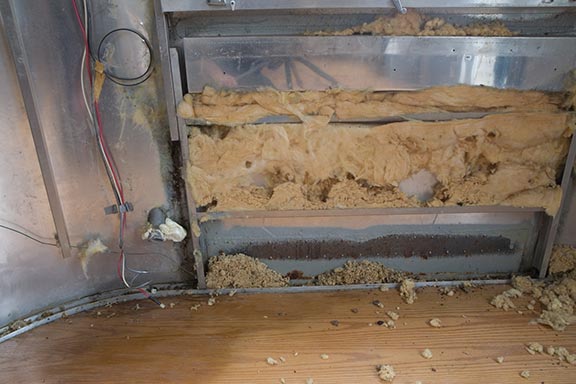 The mice had built a highway system in the fiberglass insulation.
 I knew exactly what I was getting into with this 1968 Safari 22′ single-axle Airstream (with a scale weight of 3,200#). Here’s what she looked like in the beginning. BEFORE. One of my farmhands had owned her for a few years, but said the sound and the smell of mice in the walls was getting to him. I asked him if he’d sell it to me for $2,000 and then help me renovate it. He was game.
  Floor mold. Never a good sign. But it IS a sign that water’s getting in somewhere. Turned out, the main source here was leaky window seals.
  You know what this means!
  It’s easier than you think to take out rivets. Grab a drill bit the size of your rivets and put the tip into the hole in the center.
  It will look like a tiny donut. Drill until it disappears, freeing up what the rivet is attaching. In this case, the walls. Be careful not to drill past the rivet head into the soft aluminum sheeting.
  After you’ve drilled all the rivets in a panel, use a pry bar to work things loose.
  Panels begone!
  In both ends of the Airstream, there were fiberglass panels instead of aluminum panels. These also helped structurally to strengthen both ends, but I didn’t like them. The front panel had a shelf as part of the fiberglass unit that I knew I wouldn’t want. What did I do? I discarded these and put down new strips of wood. I’ll show you that later.
  OMG! The black goo you see is mouse droppings, along with some mold from the leaky window seals. No wonder she stank to high heaven. I hate meeses to peeses.
  The mice had built a highway system in the fiberglass insulation.
